The Definitive Guide to Hardwood Floor Installation
Wiki Article
Some Ideas on Wood Flooring You Should Know
Table of ContentsThe Only Guide for Hardwood FlooringNot known Factual Statements About Flooring Stores What Does Laminate Flooring Do?The Ultimate Guide To Vinyl FlooringThe Basic Principles Of Vinyl Flooring All About Hardwood Flooring CostThe 6-Second Trick For Hardwood Flooring Cost
Prior to using the second layer, examine the floor for any type of problems. If there holes or fractures, use the epoxy filler and also wait for 12 16 hrs for it to completely dry.Our epoxy floor installers will certainly likewise do justice to the product with professional installation solutions.
Close this dialog window Share & More Back to tale Talk about this task this web link is to an outside site that may or might not meet access guidelines.
The Main Principles Of Flooring
The process of measuring, pigmenting, blending, dual potting, putting as well as spreading out is repeated till the floor is completed. Glass, Cast 3 epoxy finish material has superb self-levelling residential or commercial properties, so will just require easy work to ensure that it has full insurance coverage as well as a consistent density - after that the material will do the rest of the job.Glasscast 3 is likewise self-degassing so the bubbles will certainly pop by themselves, although we saw a small spot of flooring where bubbles didn't seem to be standing out - this can be as a result of a small patch of floor not being pre-sealed - to overcome this we rapidly passed over the surface area with a propane lantern to burst them.
When you more than happy with the floor it's time to secure the space and leave it to totally cure - this will permit the material to degas, self-level and also treatment to a remarkable high gloss surface such as this! Remember it is very vital to seal the area to guarantee that there are no draughts as this could create dust and debris to land in the resin throughout the treatment.
Fascination About Hardwood Floor Installation
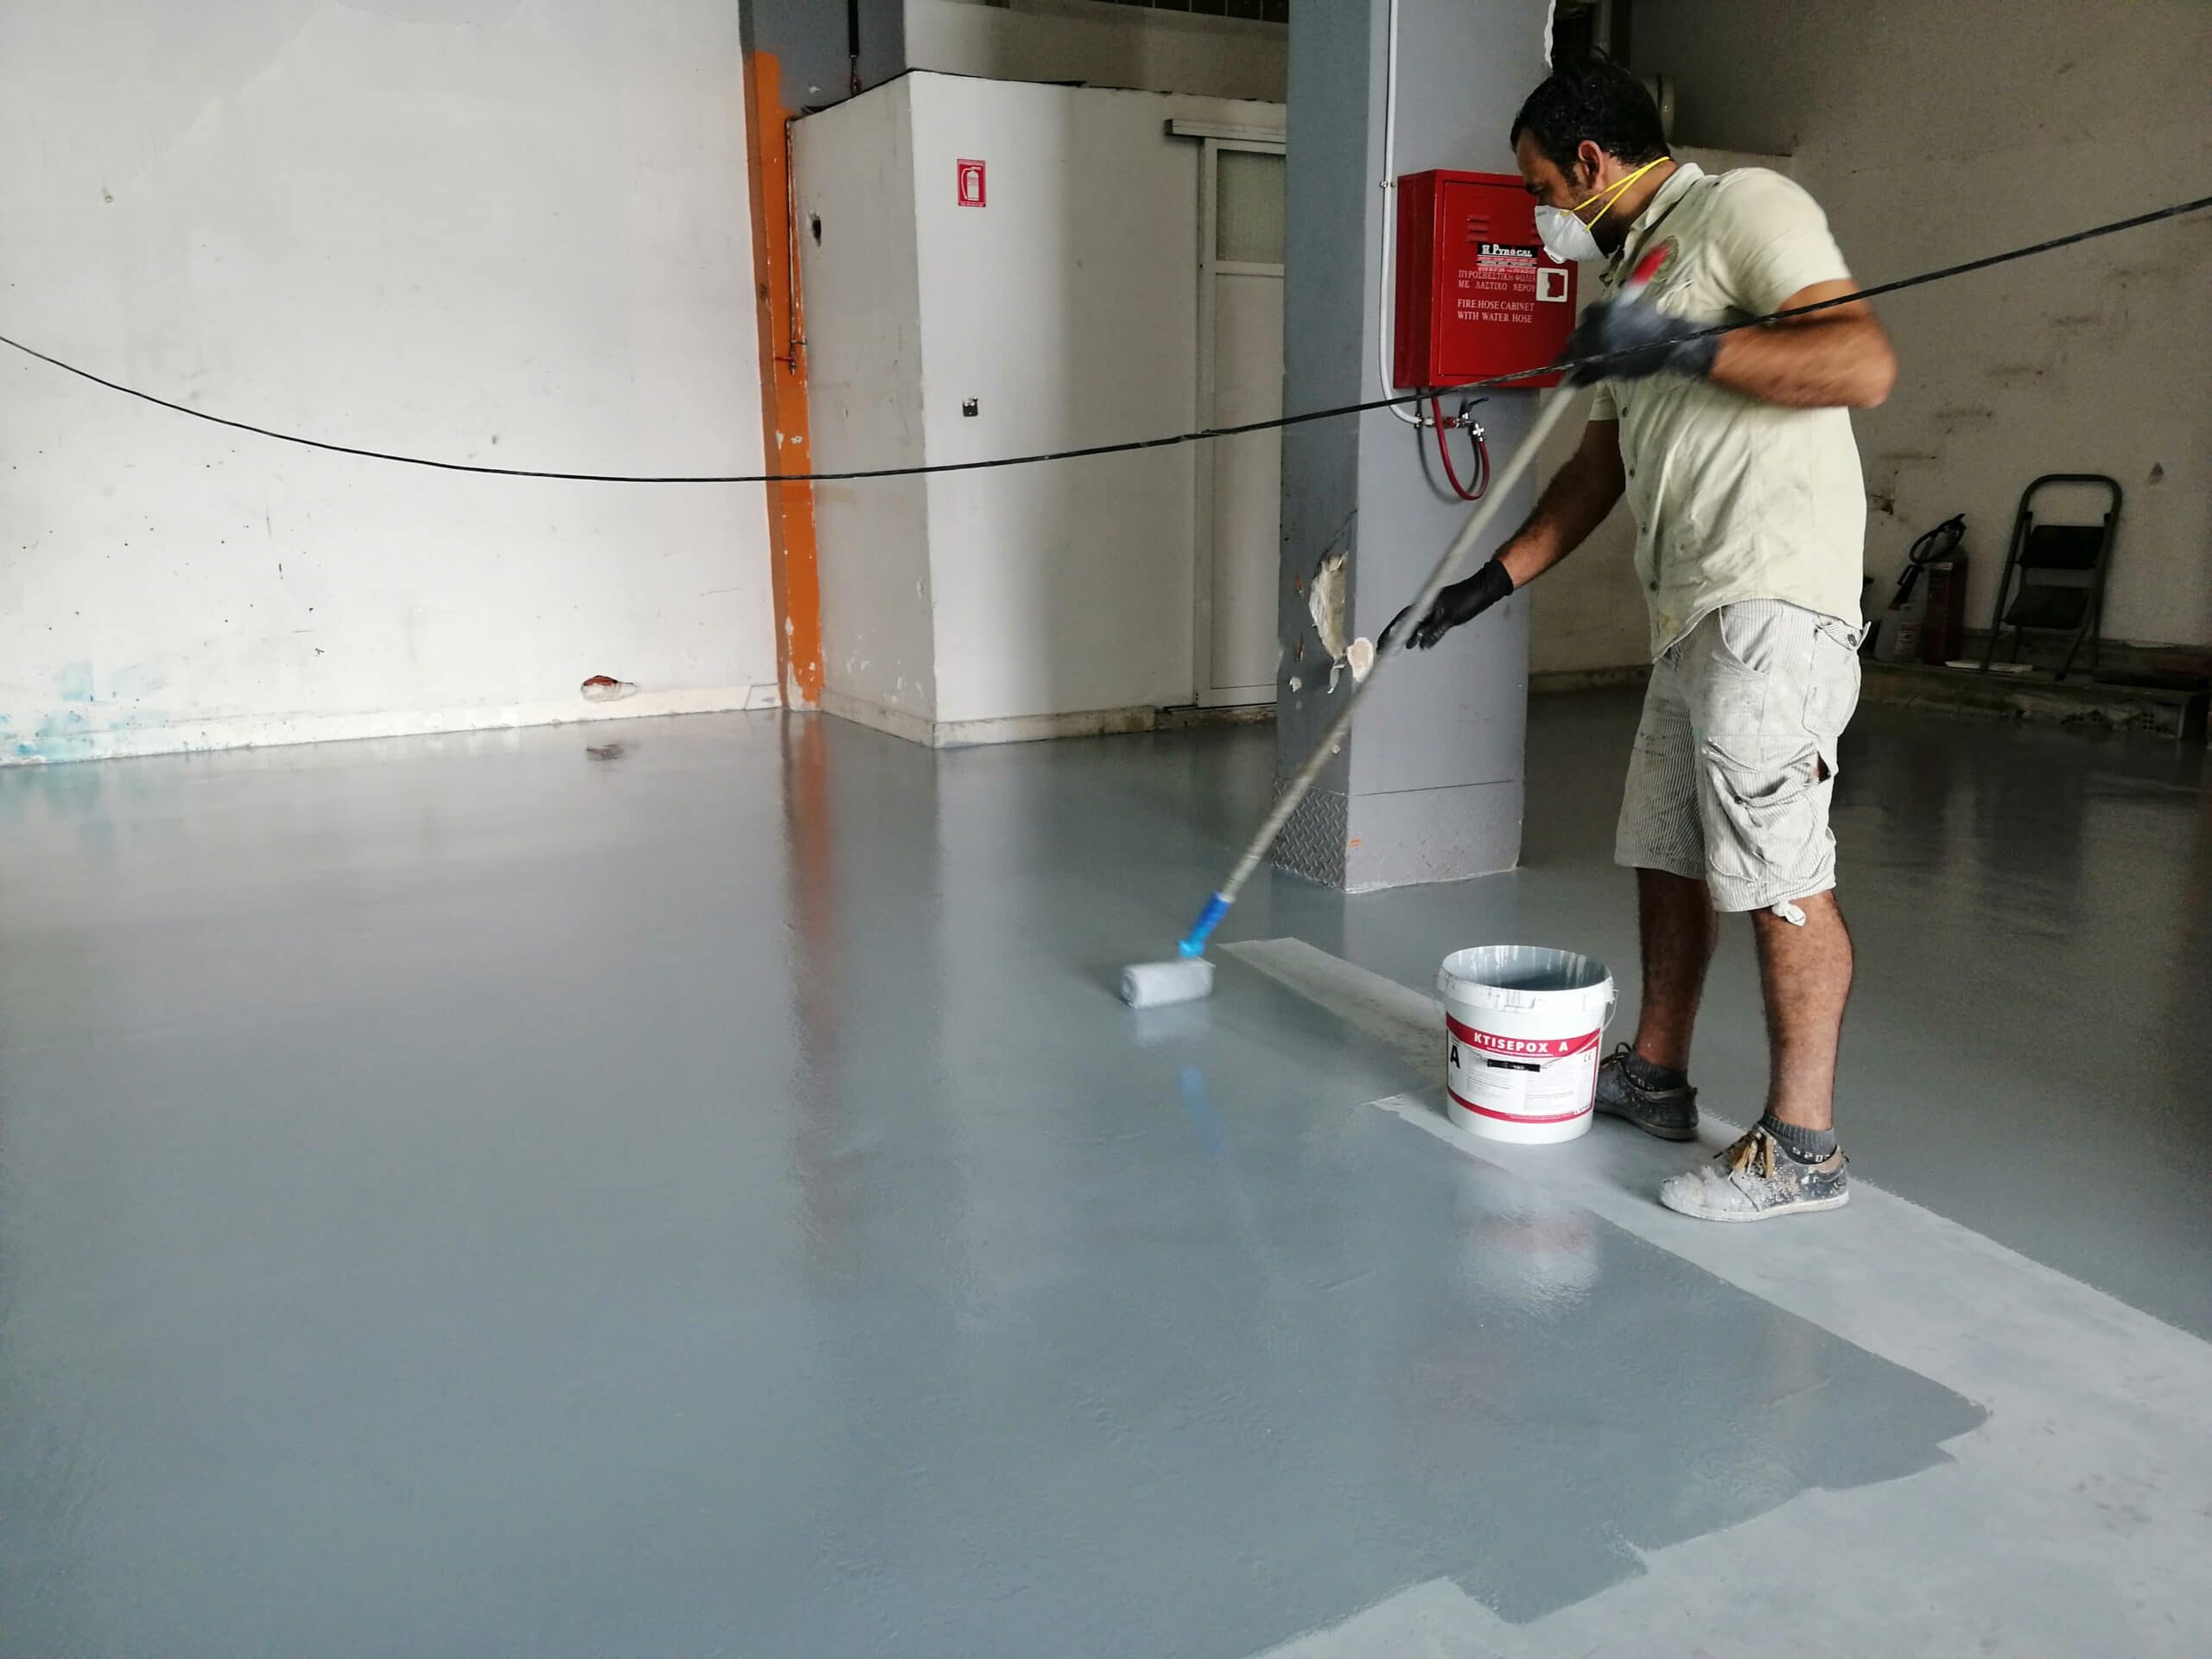
The listed below guide is a recap of the steps on how to use epoxy flooring paint. This guide puts on a simple roller applied flooring. Such epoxy systems are usually applied with one layer of guide & 2 coats of epoxy floor covering. These floors are appropriate for light as well as tool deterioration, best for garages and also storage rooms.A Self leveling epoxy floor has a tendency to have a. The below video clip clarifies the distinctions in between a roller applied and a self leveling flooring. Step 1. Preparing the surface prior to using the epoxy Preparation of the substratum is essential in order to ensure attachment in between the epoxy item and the substrate.
Indicators on Installing Laminate Flooring You Need To Know
Utilizing a floor grinder enables you to make use of different kinds of grinding tools depending on your needs. As an example if you need to grind harsh concrete, you require to use a hostile as well as coarse diamond tool. If you need to offer the existing surface a light sanding, you can pick rather to utilize a high grit fining sand tool.This is why we apply epoxy primer. Constantly prime the floor, do not believe claims that priming is not essential. Priming will certainly offer your floor a longer life and also much better adhesion to the substrate. It will seal the substratum and decrease the risk of bubbles and gasses in your last epoxy coat.
Make certain that the locations are aerated correctly. In some instances, you will use the primer as well as notification that the item gets very promptly taken in by the substrate. This is very typical with messy as well as soft concrete based floorings. in addition to the very first one. Utilize a correct electrical mixer to mix the An and B component of the primer.
The smart Trick of Flooring Stores That Nobody is Talking About

Most likely it will additionally require a bit of fining sand prior to continuing to the following step. Several days have actually most likely passed since you started the process of mounting your epoxy floor. If you have actually done all the previous steps correctly, you are ultimately prepared to apply the first coat.
You will require to lightly sand these areas to eliminate any kind of marks that might be visible on the last flooring. Use a vacuum cleaner to accumulate any kind of dust.
The Buzz on Flooring Installation
Make certain that all the brand-new cracks as well as holes are sealed & filled up prior to beginning the next coat. If required wait an additional dry for the grout to dry prior to re-coating. If you adhered to the epoxy floor covering procedure in this short article, then the check out this site final layer should read the article be the most convenient action.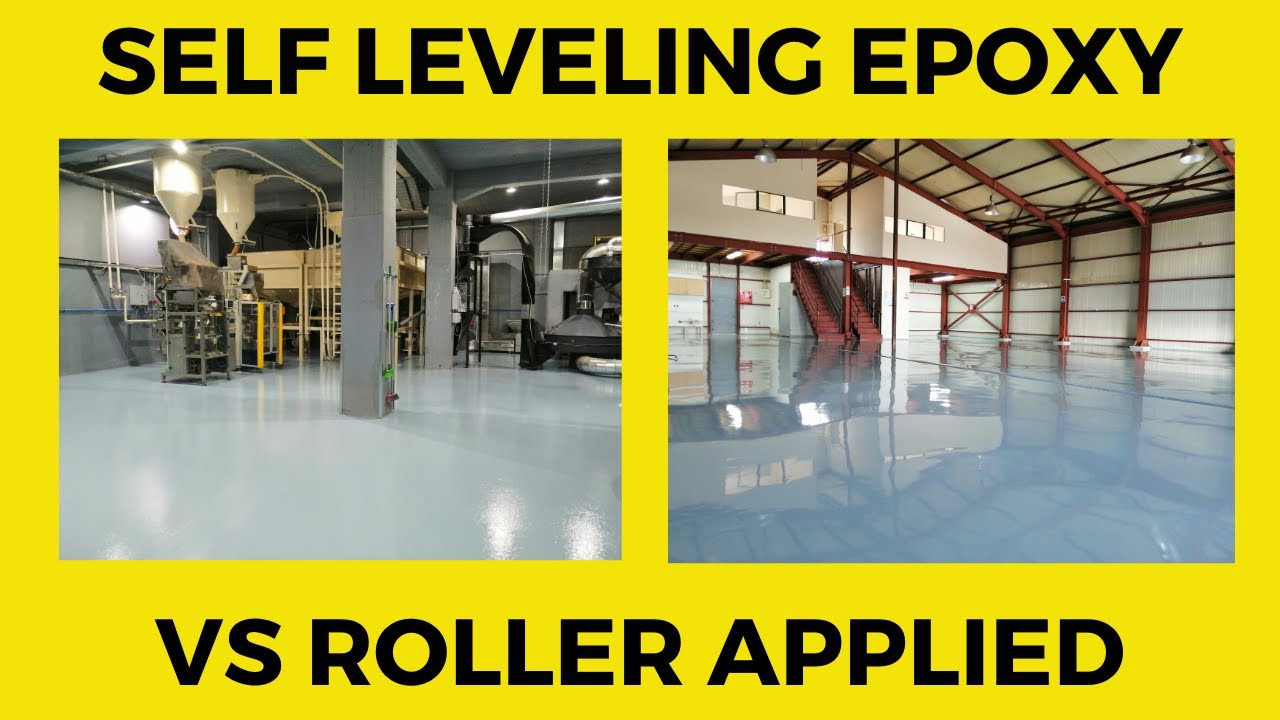
This training course was developed for applicators who want to enter into epoxy flooring. and view the understanding material as lot of times as you desire! You will certainly obtain that has actually been distilled right into over 20 lessons. We have actually had numerous trainees from around the world that have effectively completed the course.
Getting The Installing Laminate Flooring To Work
Step 2: Check Weather Prediction Prior to you start make certain the air temperature level is 60 levels as well as increasing and also that your piece goes to a minimum of 50 levels. It will certainly be near difficult for the epoxy to set if you attempt to do this in the winter months. Action 3: Sweep It Thoroughly Make use of a mop to cleanse the piece.The goal is to not over-wet the floor so it will certainly also dry rapidly. Step 6: Apply Etch Pretreatment Mix the citric acid concrete etch with warm water per the instructions. Then apply, scrub, and squeegee off the floor similarly as the degreaser. The citric acid will help open up the leading pores of the concrete so the epoxy adheres well.
Step 8: Test For Existing Sealant Inspect to see if there is still leading sealant on the floor. If the water grains up, there is an existing sealer that might conflict with the adhesion look at this web-site of the epoxy.
Report this wiki page